Getting Started
Prepare Datasets
Dataset with vector observation
The dataset must be a CSV file containing the following columns. The data should be chronologically ordered.
| column name | description |
|---|---|
| episode | an episode ID |
| observation:X | a real value for the Xth dimension in an observation |
| action:X | a real value for the Xth dimension in an action (continuous control) or an action ID (discrete control) |
| reward | a real value for reward |
This is an example CartPole data:
episode,observation:0,observation:1,observation:2,observation:3,action:0,reward
0,0.03197332076282214,0.023978136772313002,-0.01460231690901137,0.01428123941035453,1,0.0
0,0.0324528834982684,0.21930642661209865,-0.01431669212080428,-0.28297288746447075,0,1.0
.
.
.
Dataset with image observation
The dataset must contain a CSV file and image files. The data must contain the following columns.
| column name | description |
|---|---|
| episode | an episode ID |
| observation:0 | a image file name (e.g. observation_0.png) |
| action:X | a real value for the Xth dimension in an action (continuous control) or an action ID (discrete control) |
| reward | a real value for reward |
This is an example:
episode,observation:0,action:0,reward
0,observation_0.png,1,0.0
0,observation_1.png,0,0.0
.
.
.
Note
The image files must be located in the directory that contains only image files to upload.
Start Server
At the first launch, $HOME/.minerva will be created to store datasets, databases and training metrics.
You can configure this by setting $MINERVA_DIR.
For example:
$ export MINERVA_DIR=$HOME/.custom_dir
Now you can start MINERVA as follows:
$ minerva run [--host HOST_NAME] [--port PORT]
Then, open http://localhost:9000 and you’ll see the MINERVA UI.
Upload Dataset
To upload a new dataset, click ADD DATASET button.
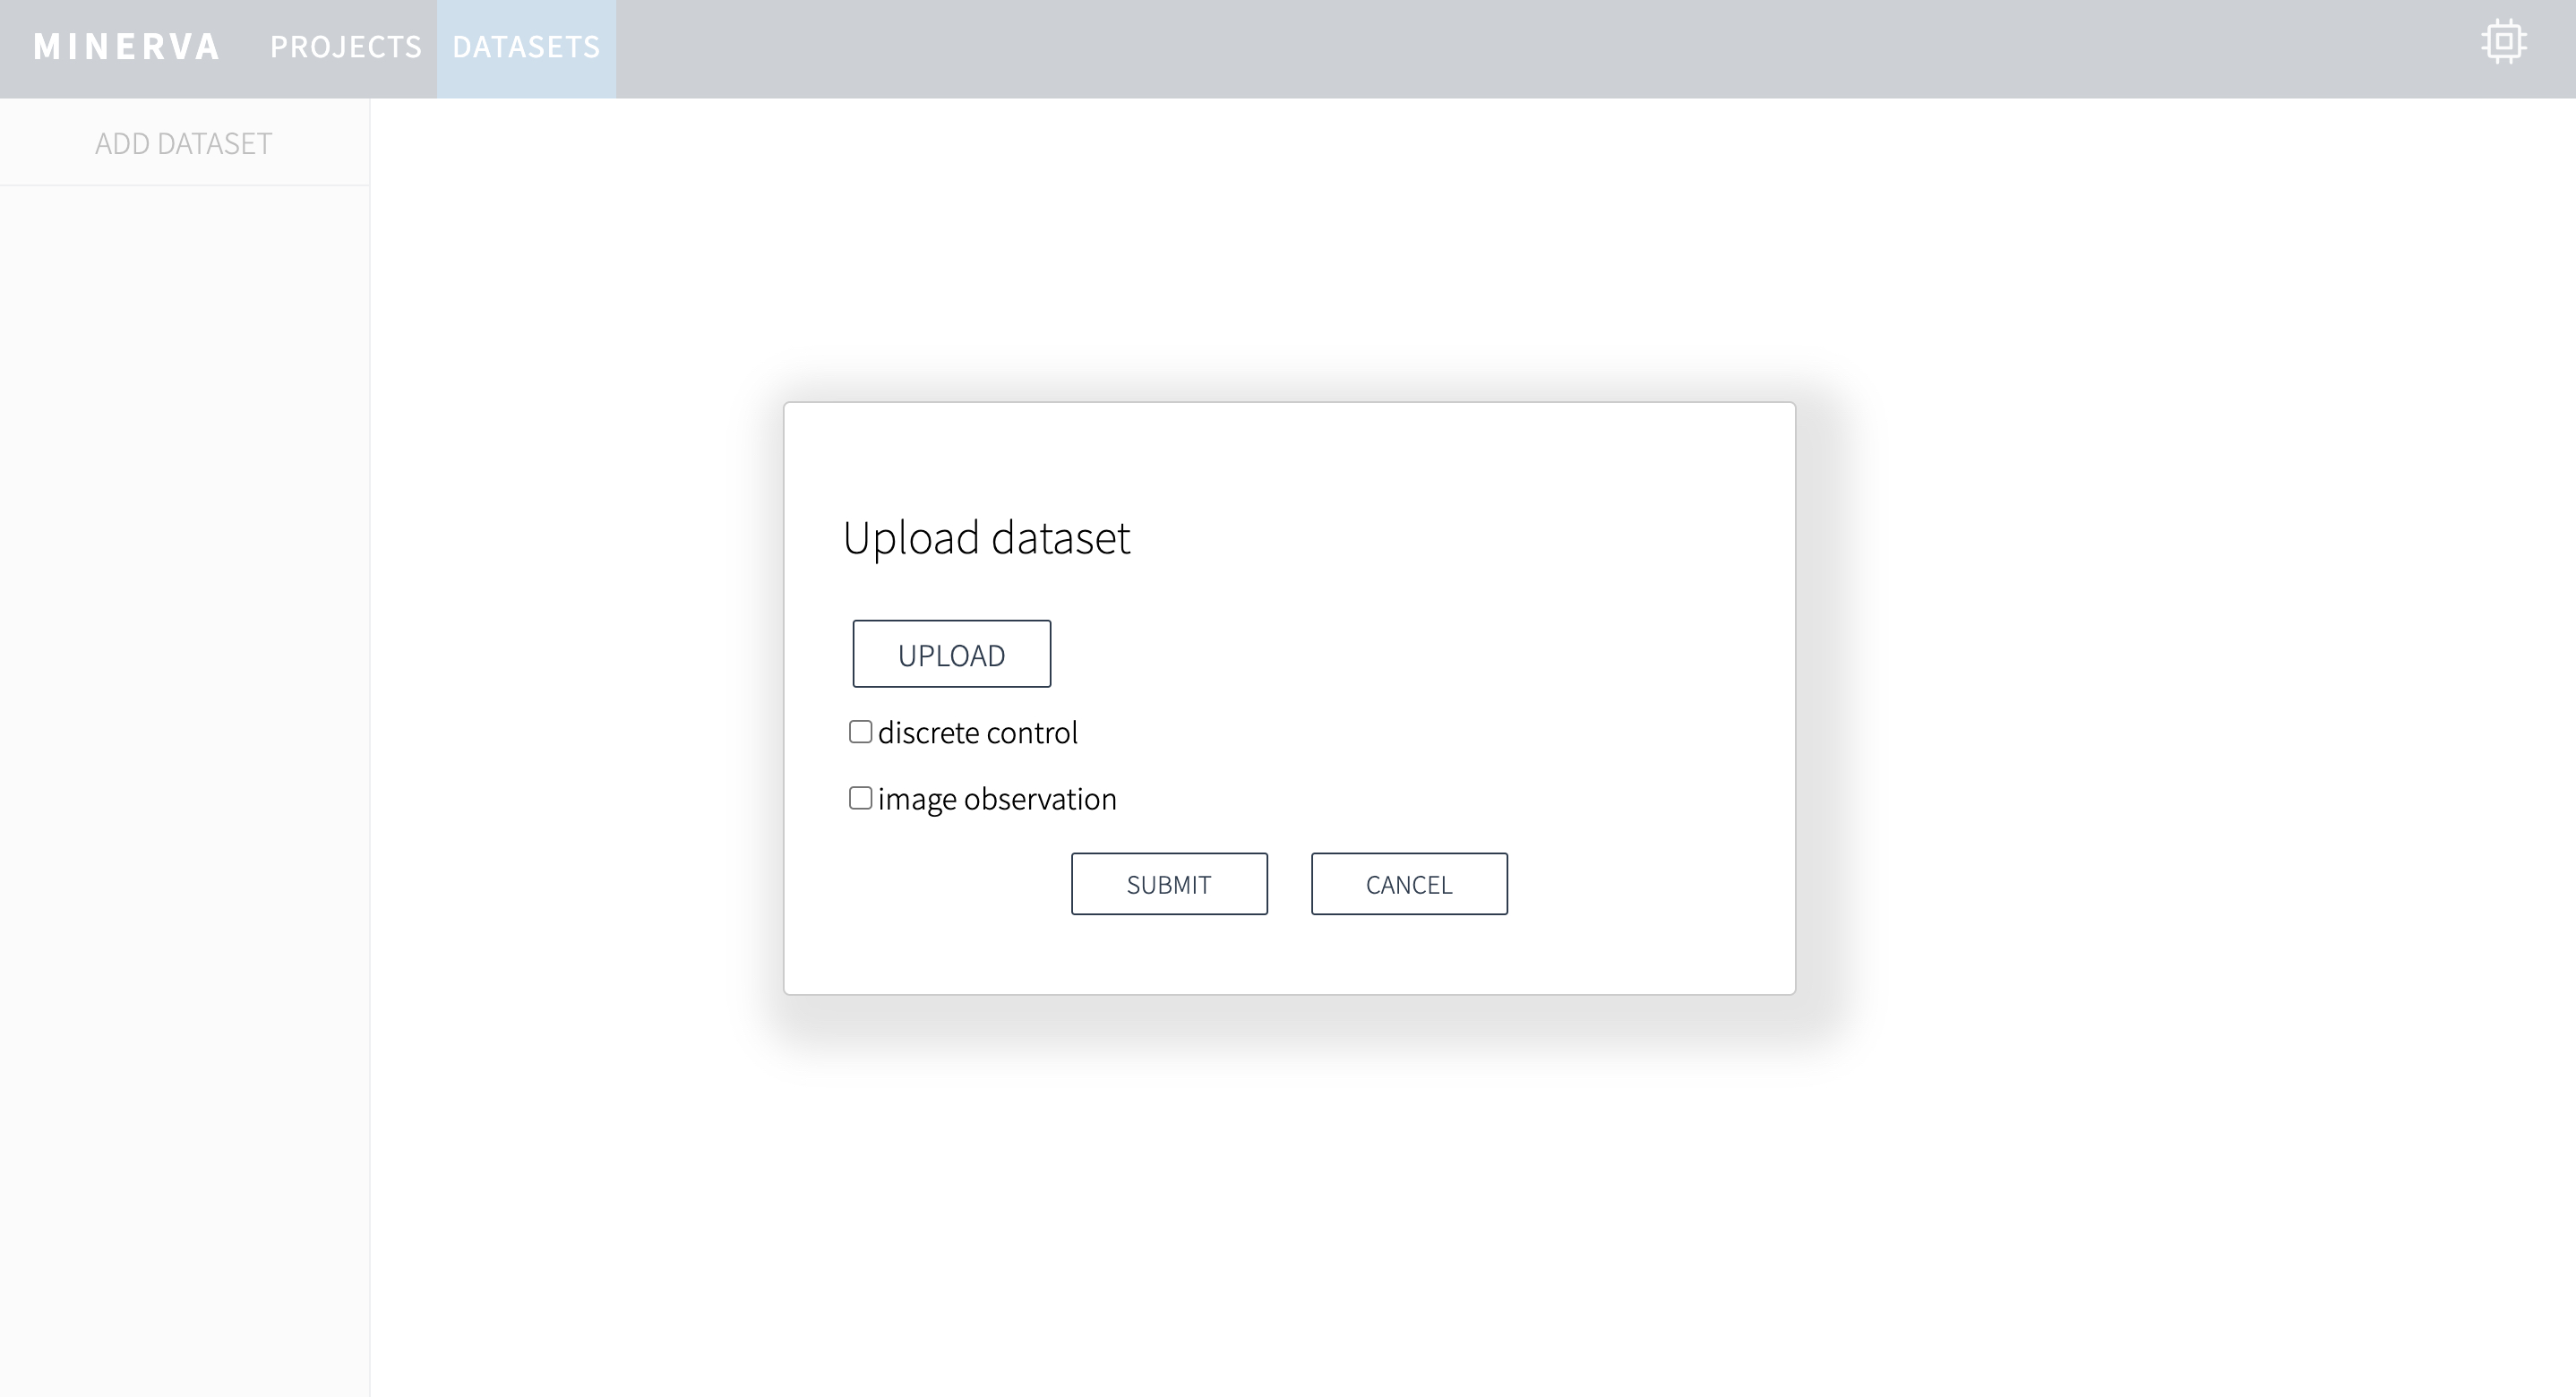
Upload dataset with vector observation
- Click
UPLOADbutton to select the dataset CSV file. - Check
discrete controlif the action-space is discrete. - Click
SUBMITto upload the dataset.
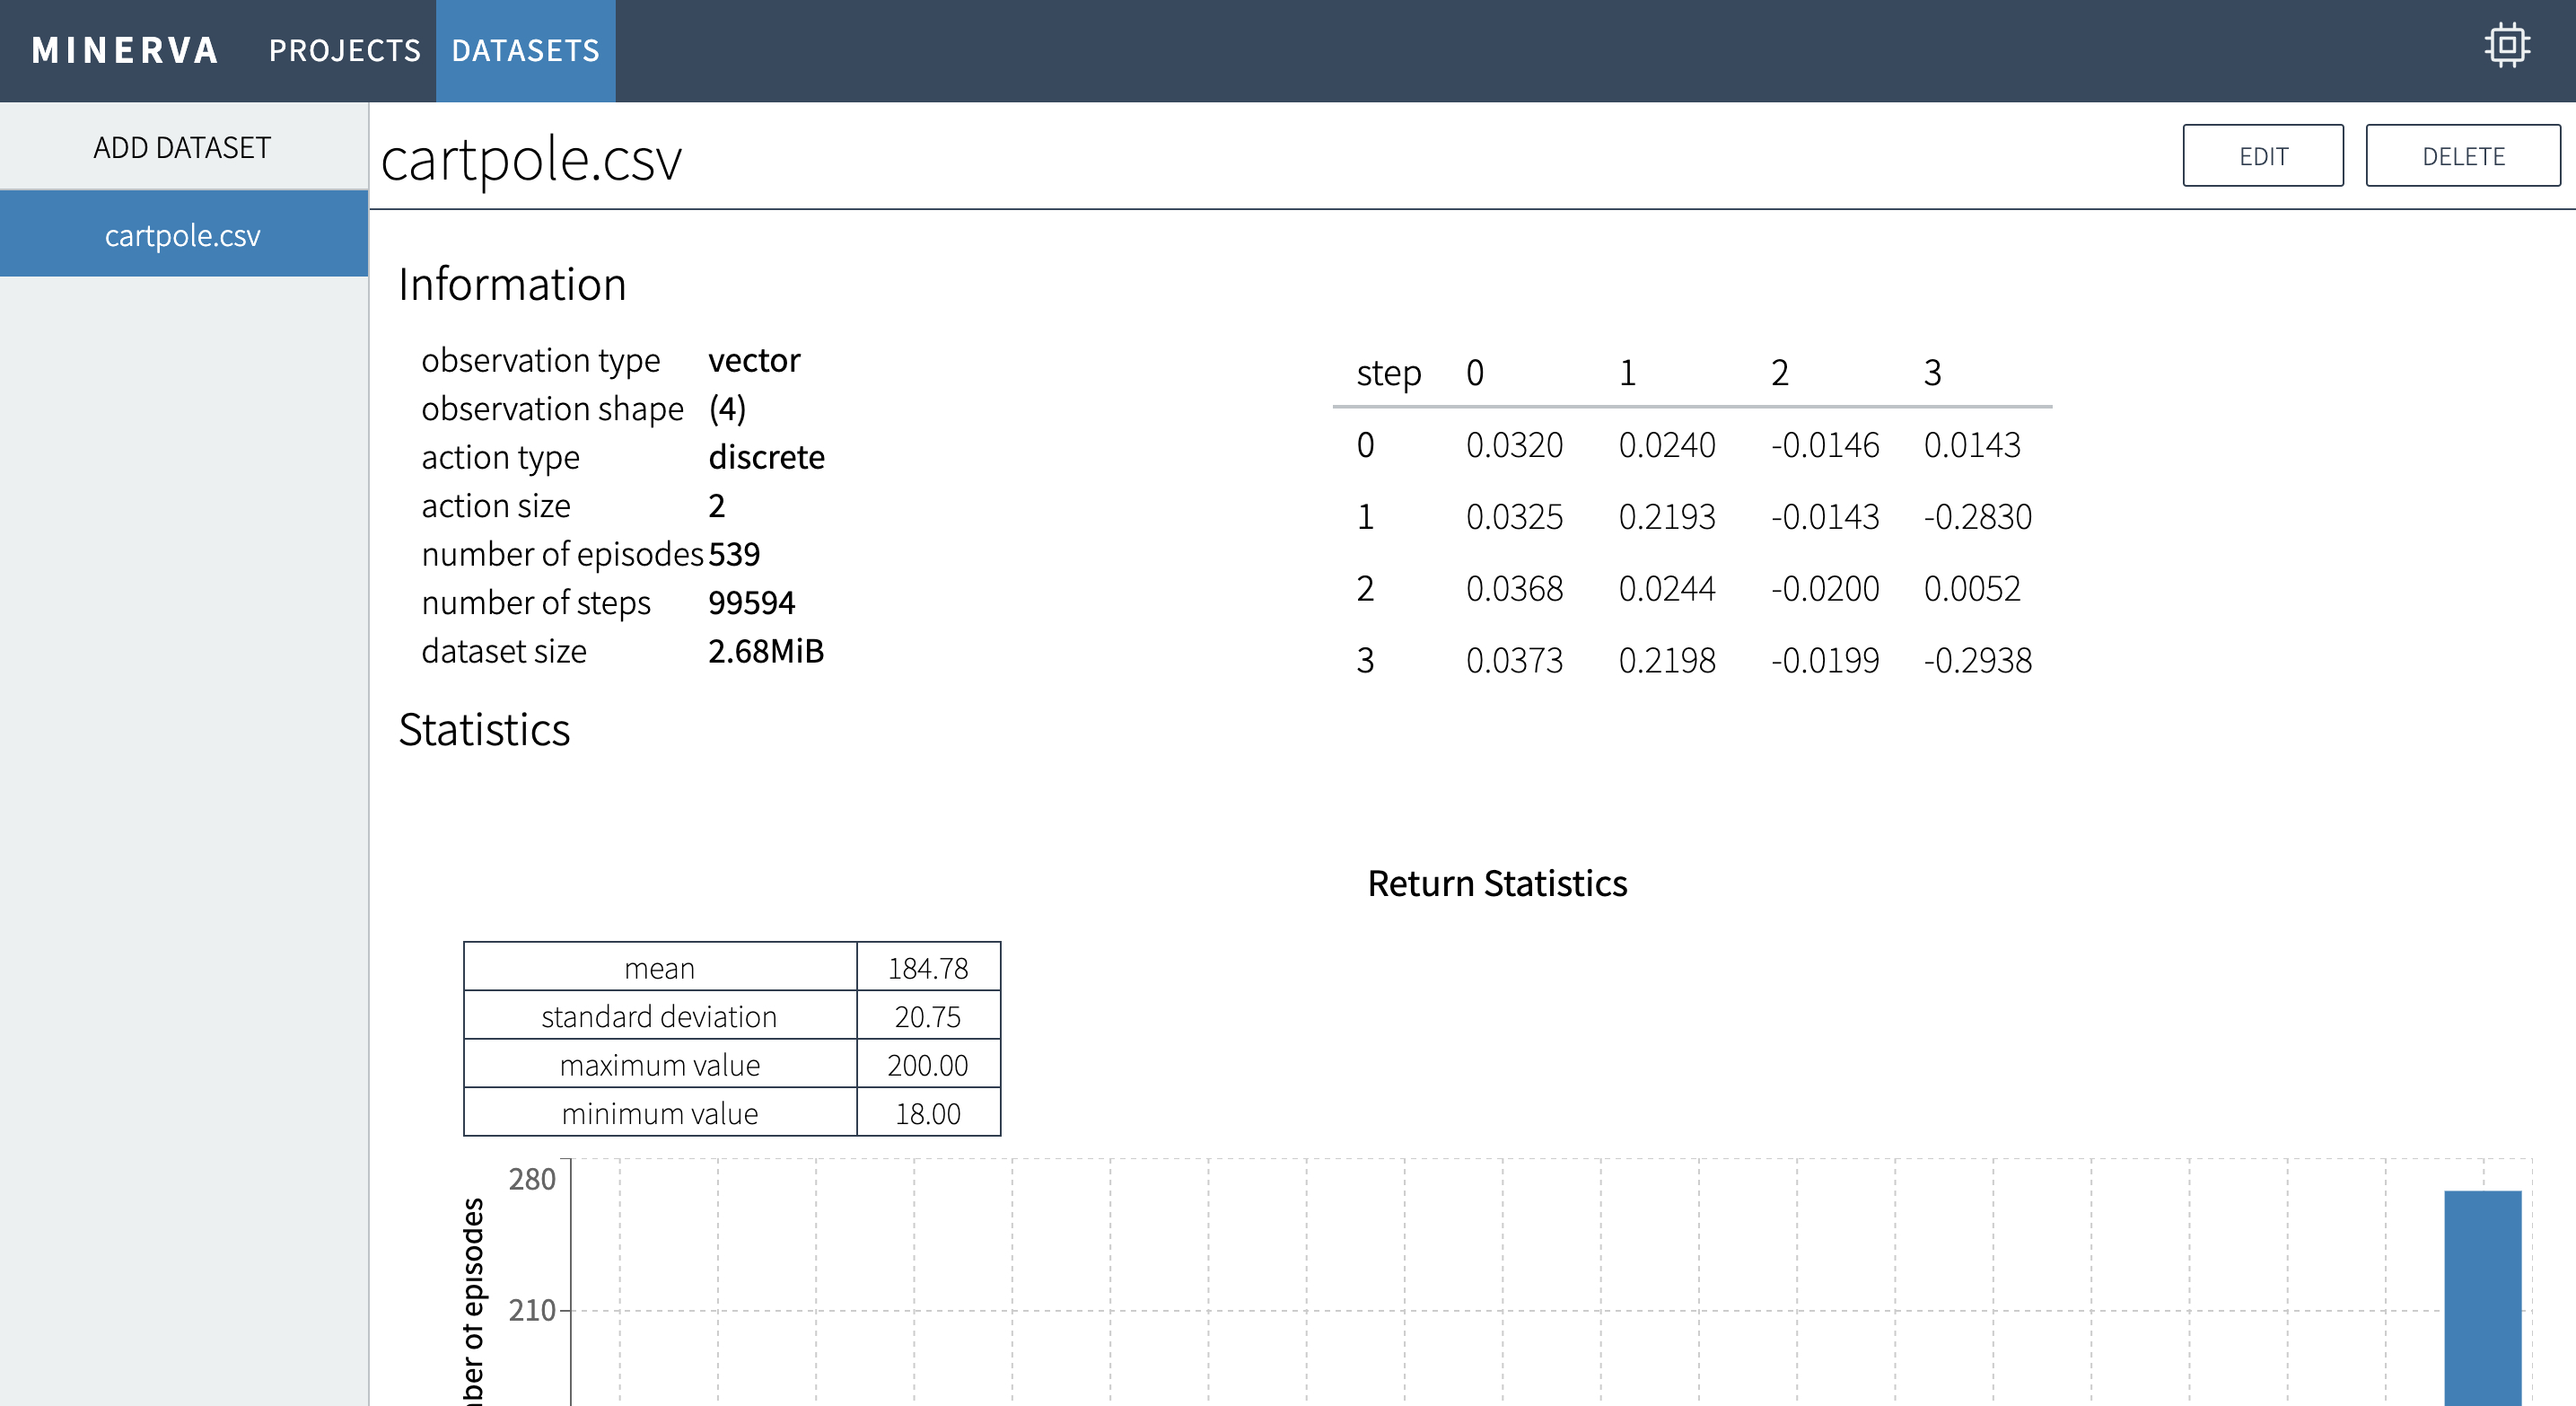
This is an example dashboard screen after uploading a vector dataset.
Upload dataset with image observation
- Click
UPLOADbutton to select the dataset CSV file. - Check
discrete controlif the action-space is discrete. - Check
image observation. - Click
UPLOAD IMAGE DIRECTORYbutton to select the directory containing image files. - Click
SUBMITto upload the dataset.

This is an example dashboard screen after uploading an image dataset.

Note
The all files in the selected directory will be uploaded.
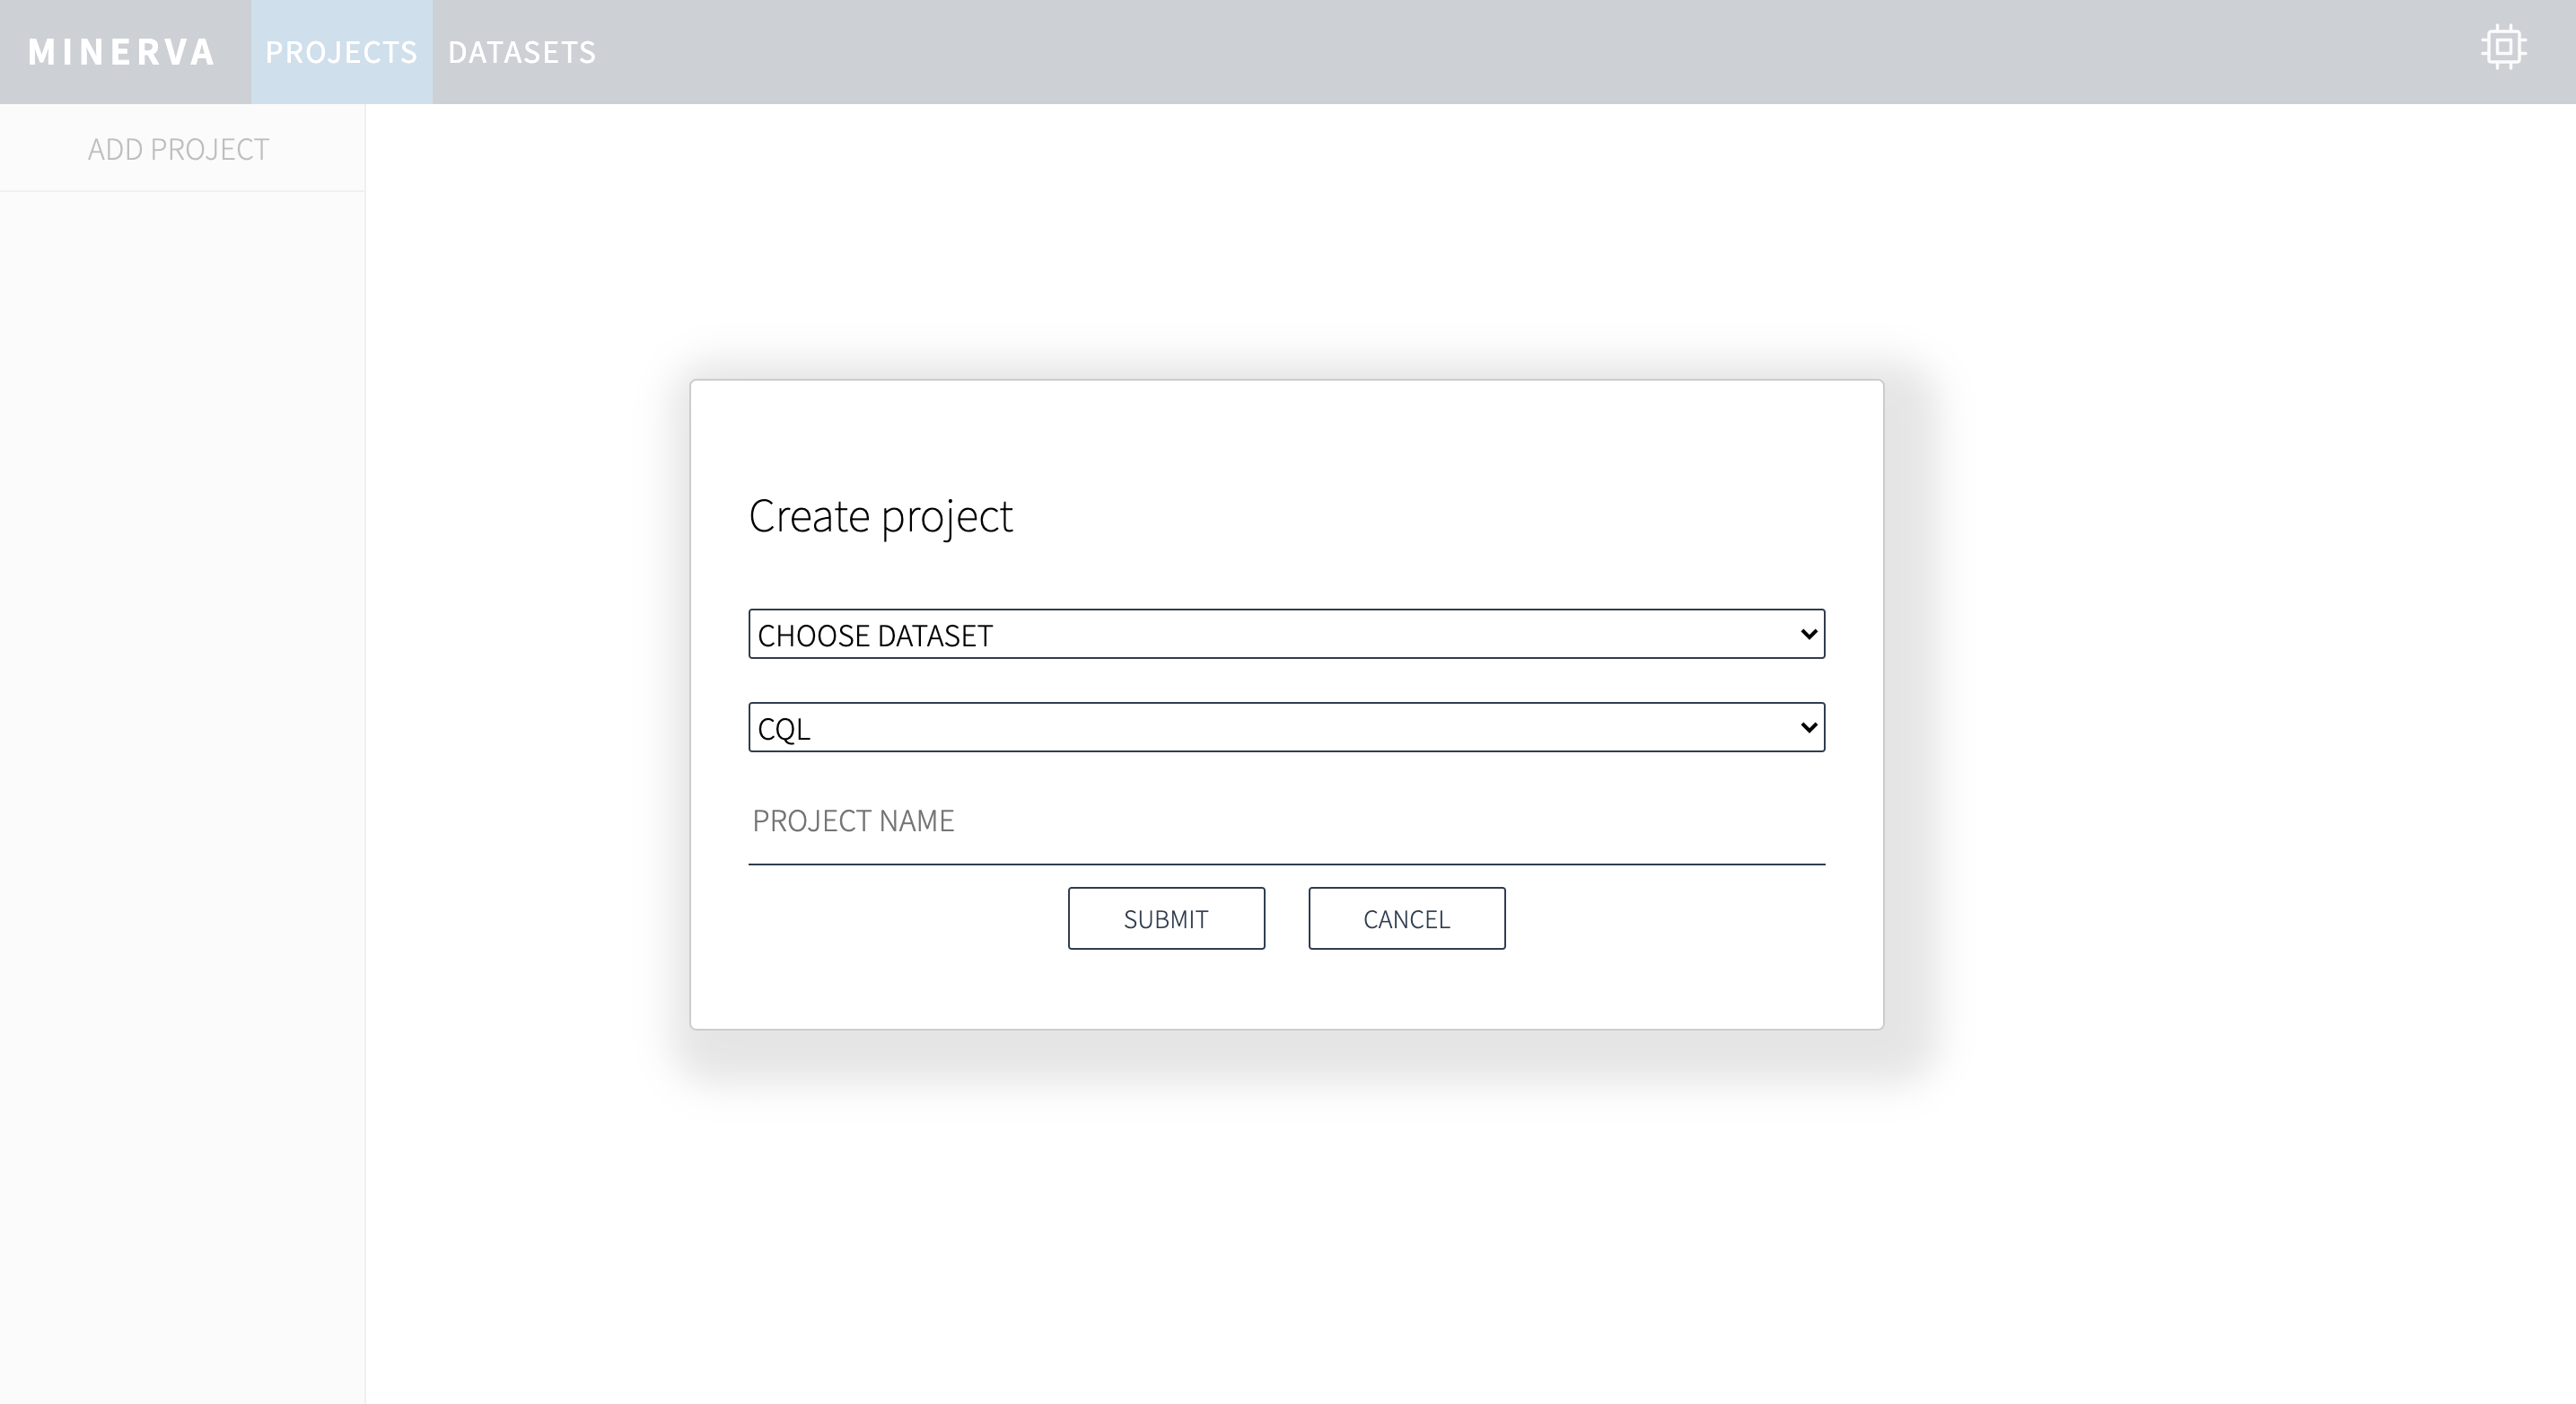
Create Project
To create a new project, click ADD PROJECT in the project page.
Then,
1. Choose a dataset from the uploaded ones.
1. Choose an algorithm to learn.
2. Fill the project name.
3. Click SUBMIT button to create.
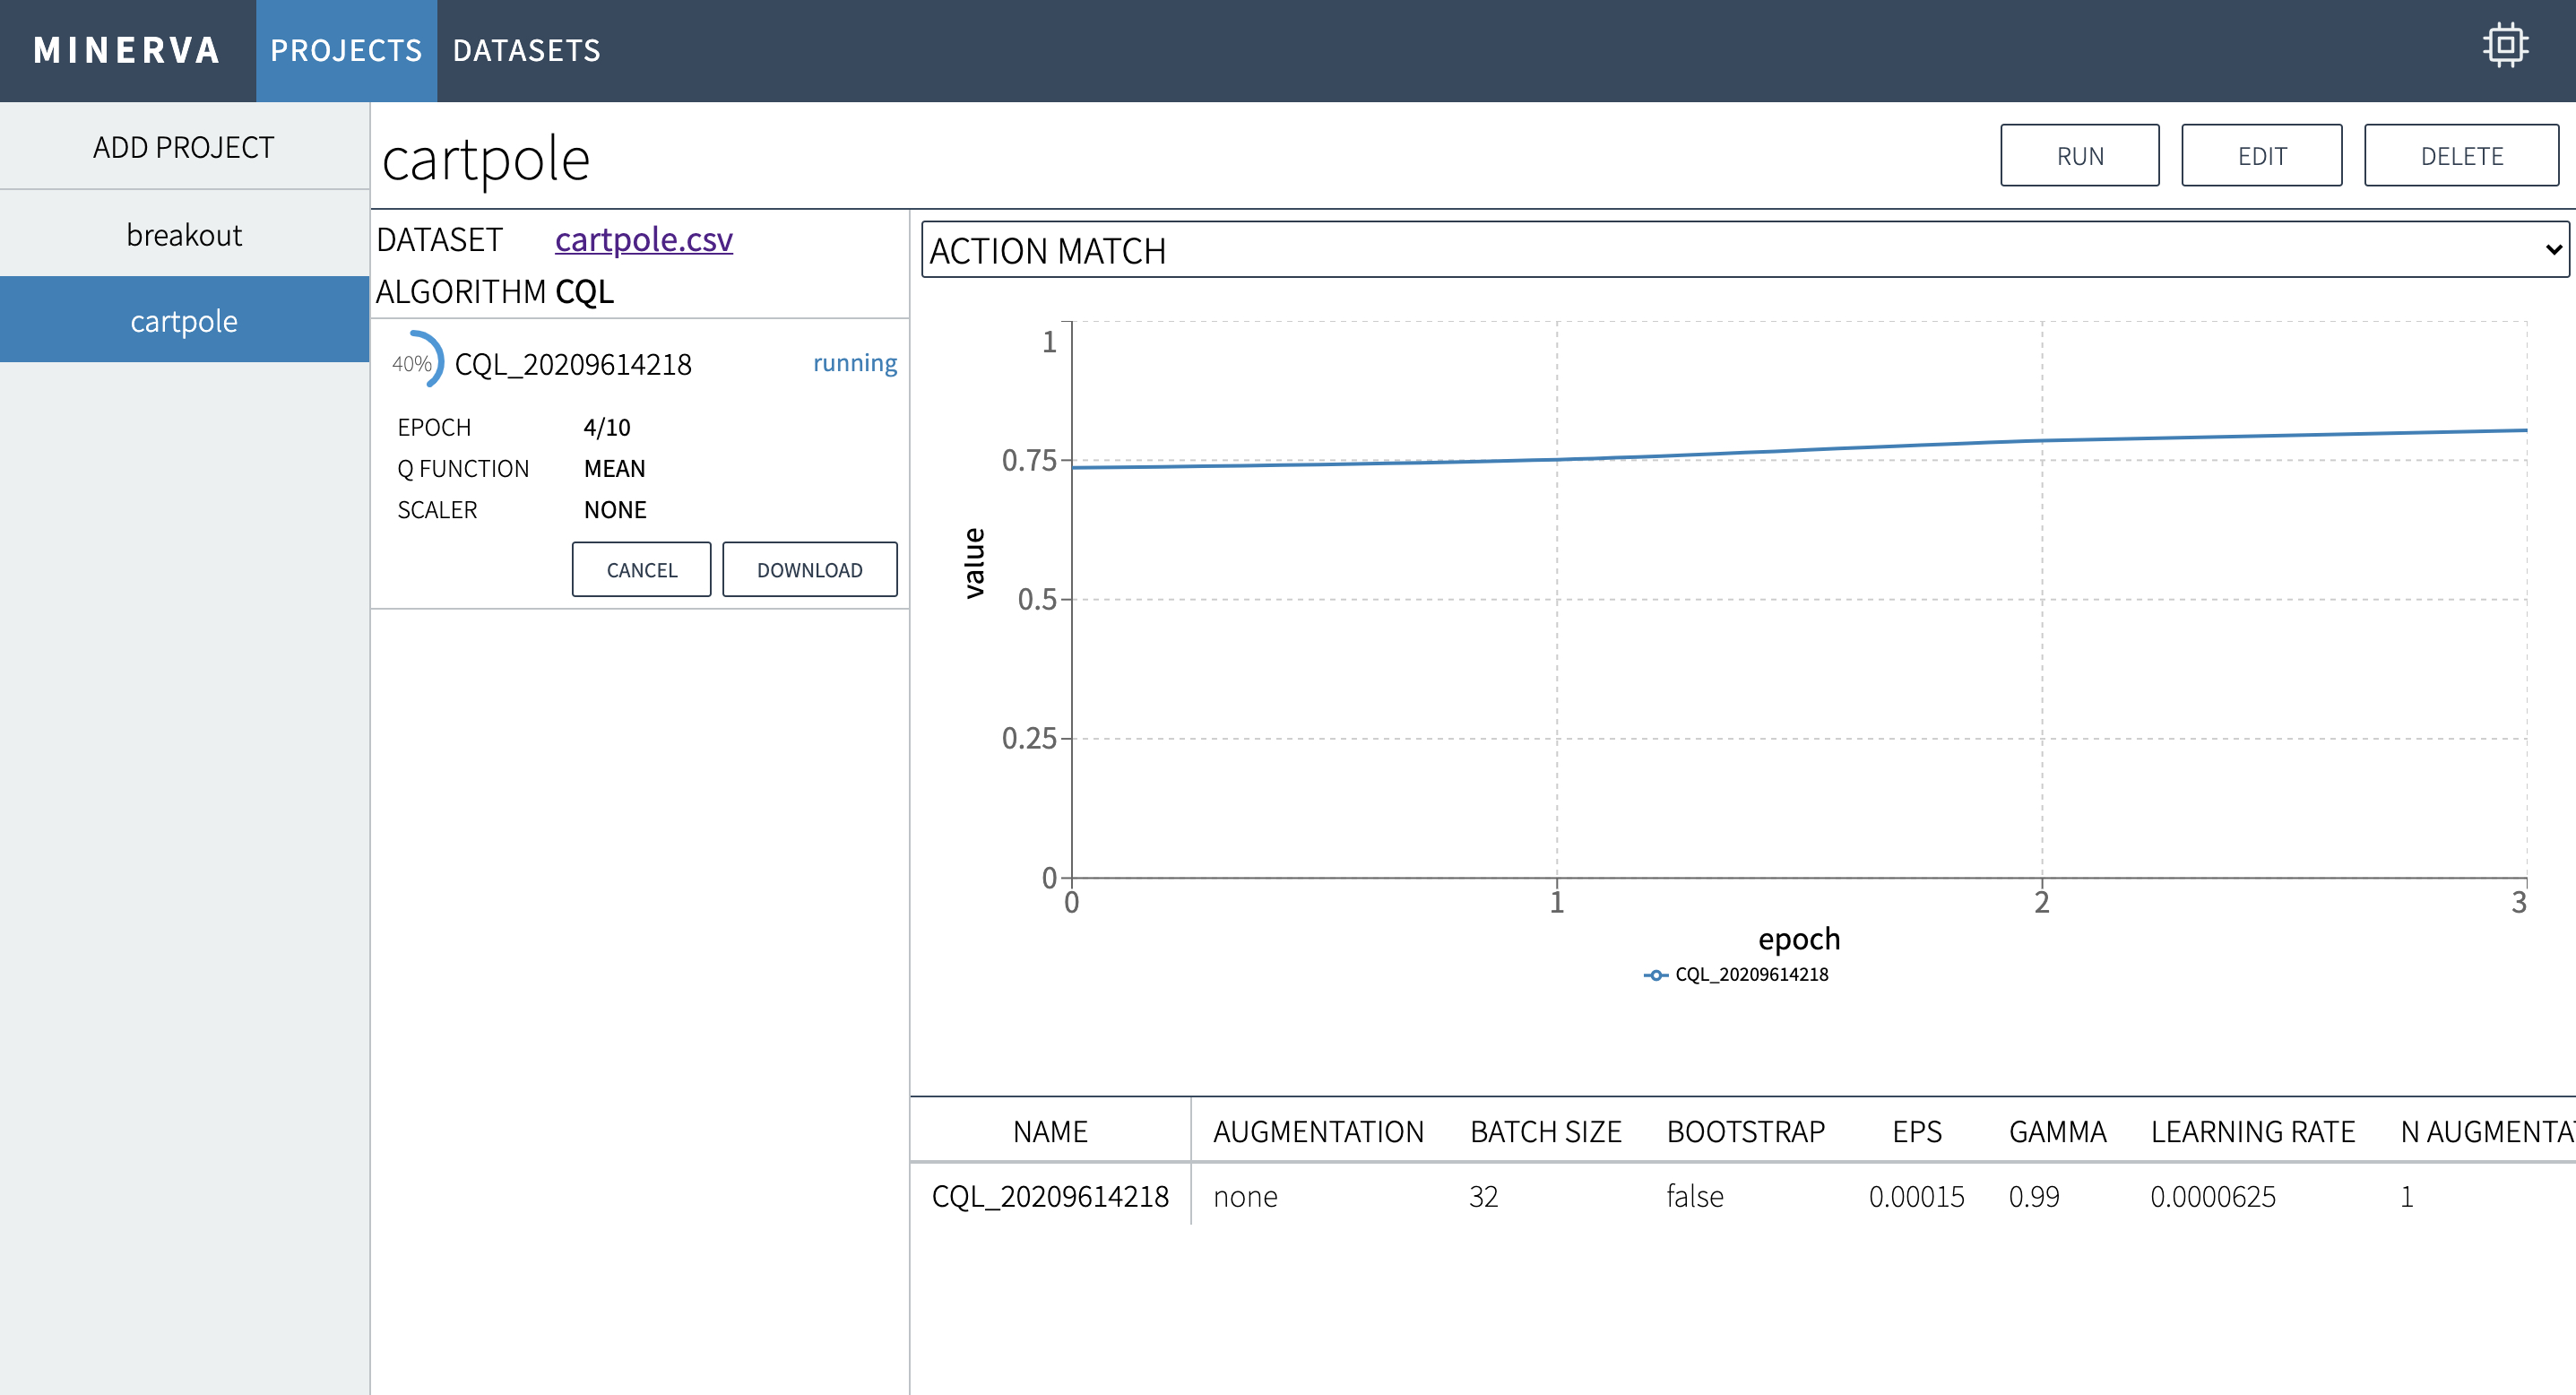
Start Training
Once you created a project, you will see an empty project like below.
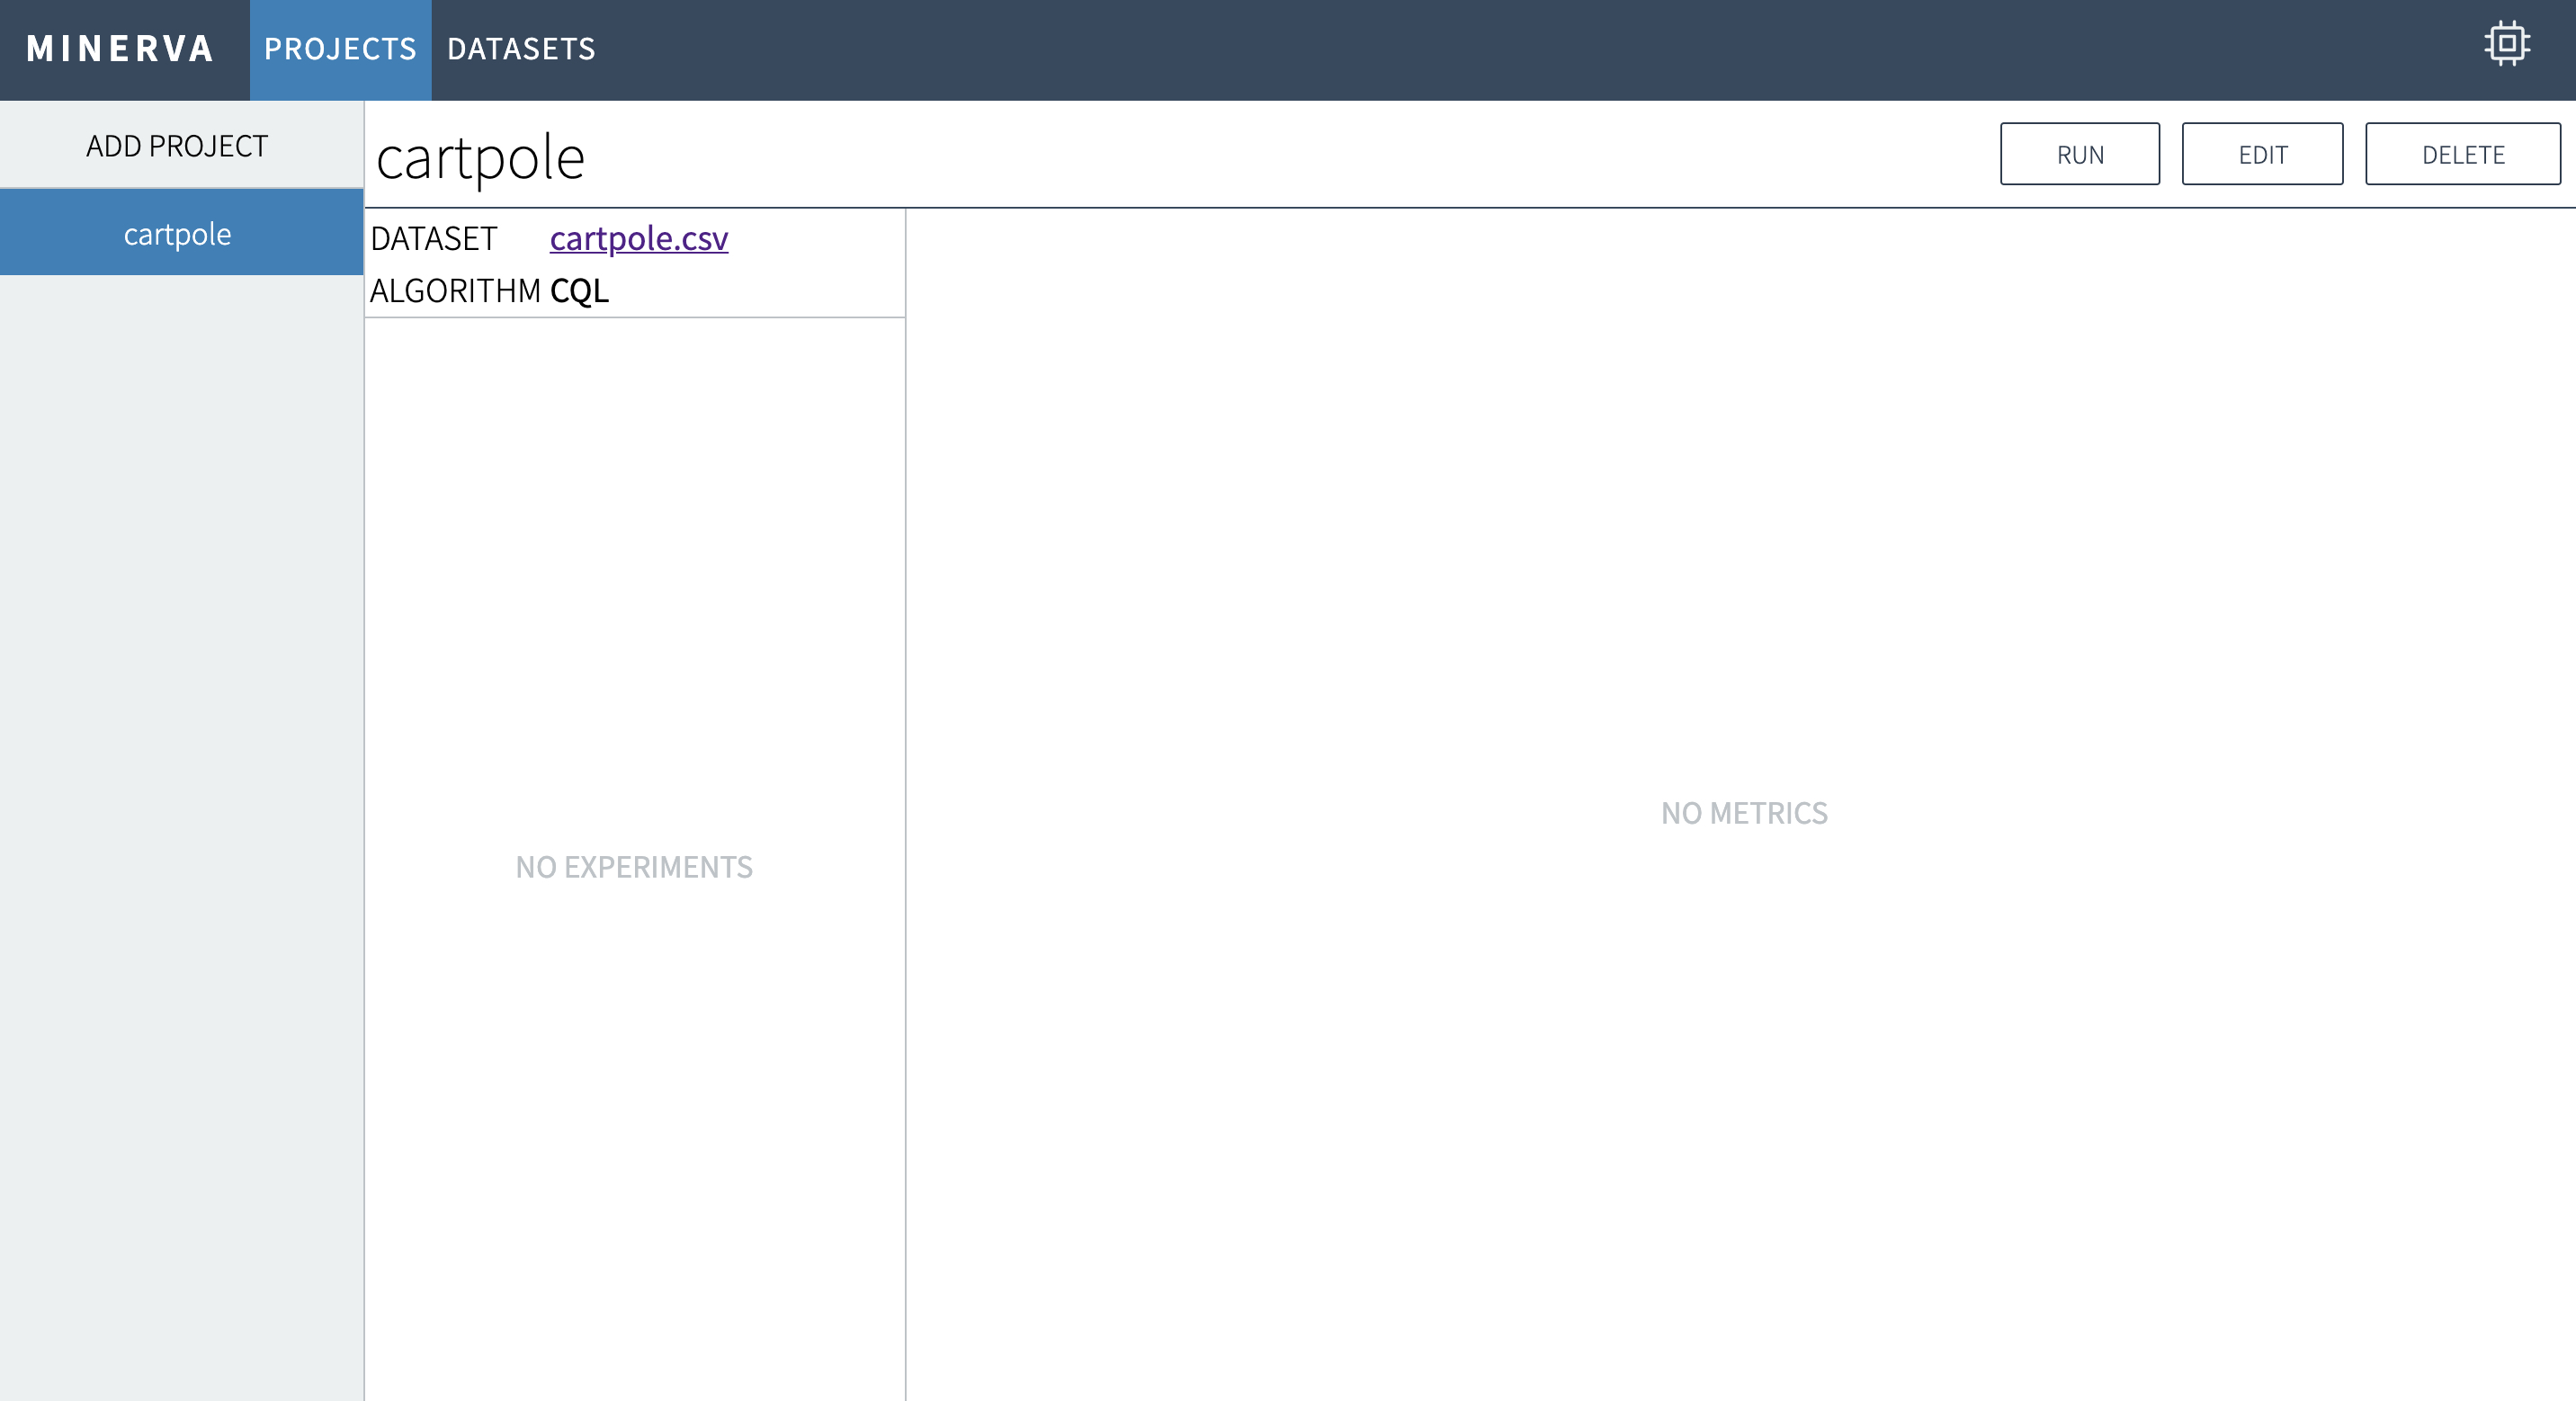
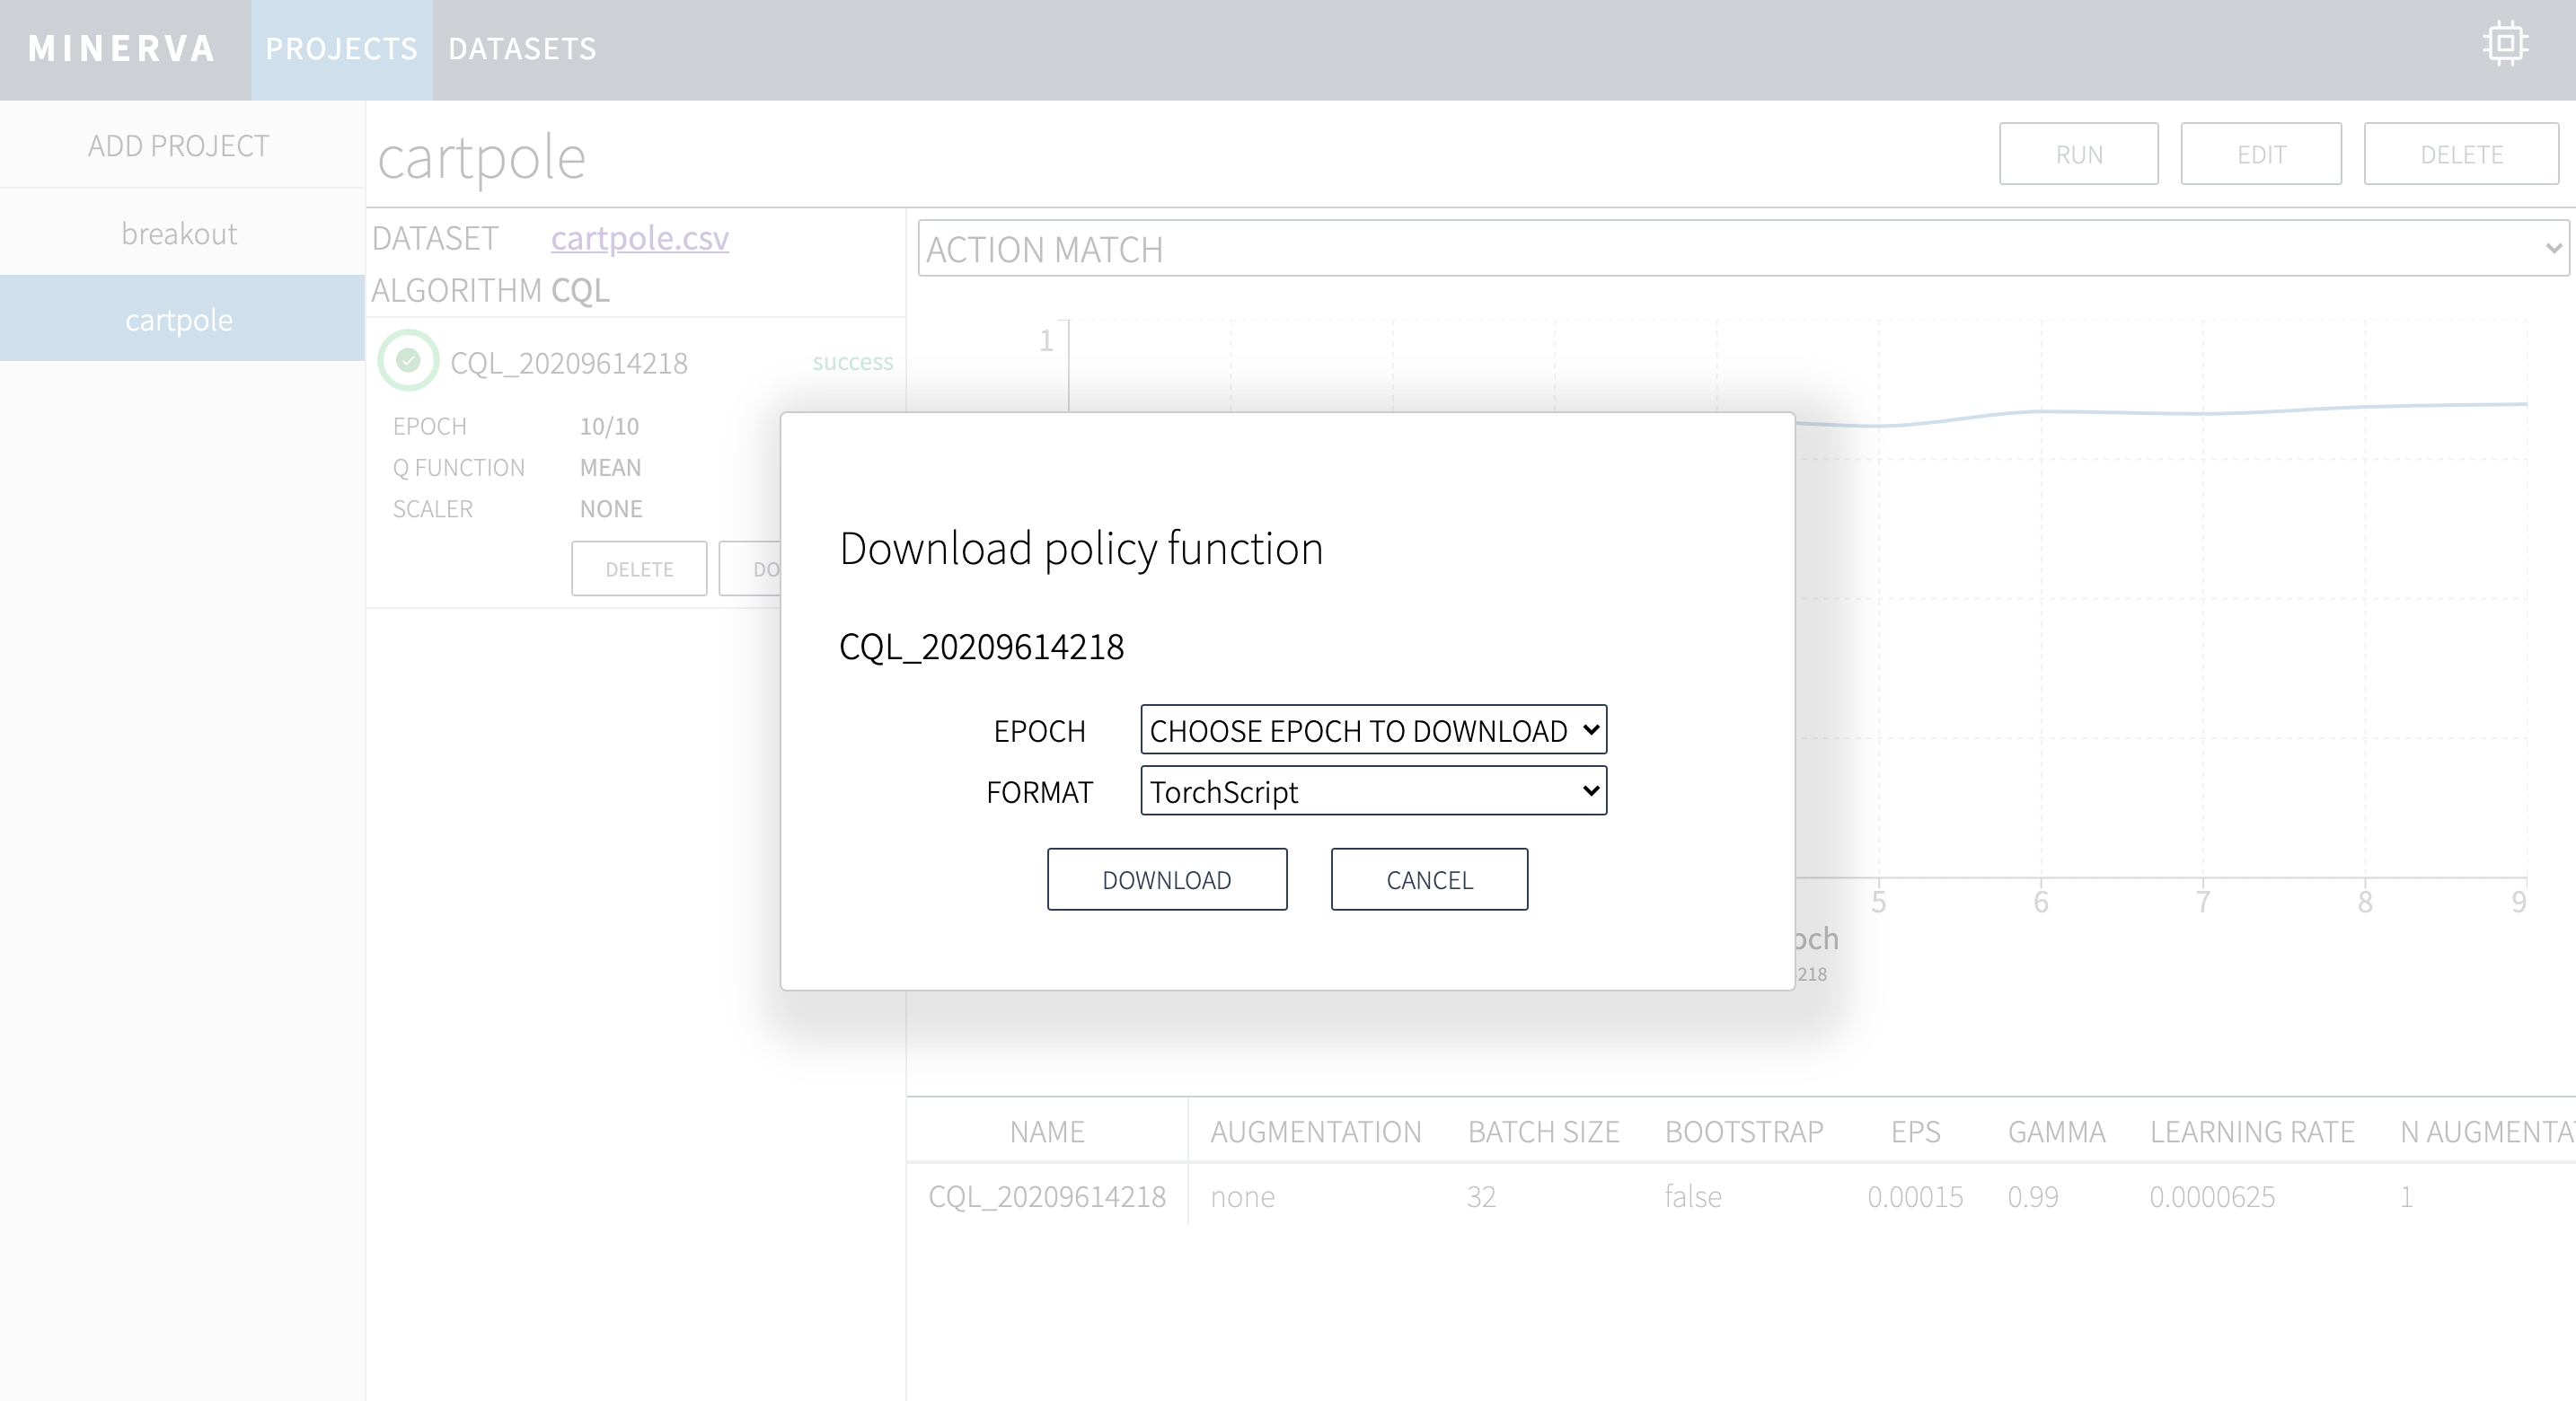
Click RUN button to start training.
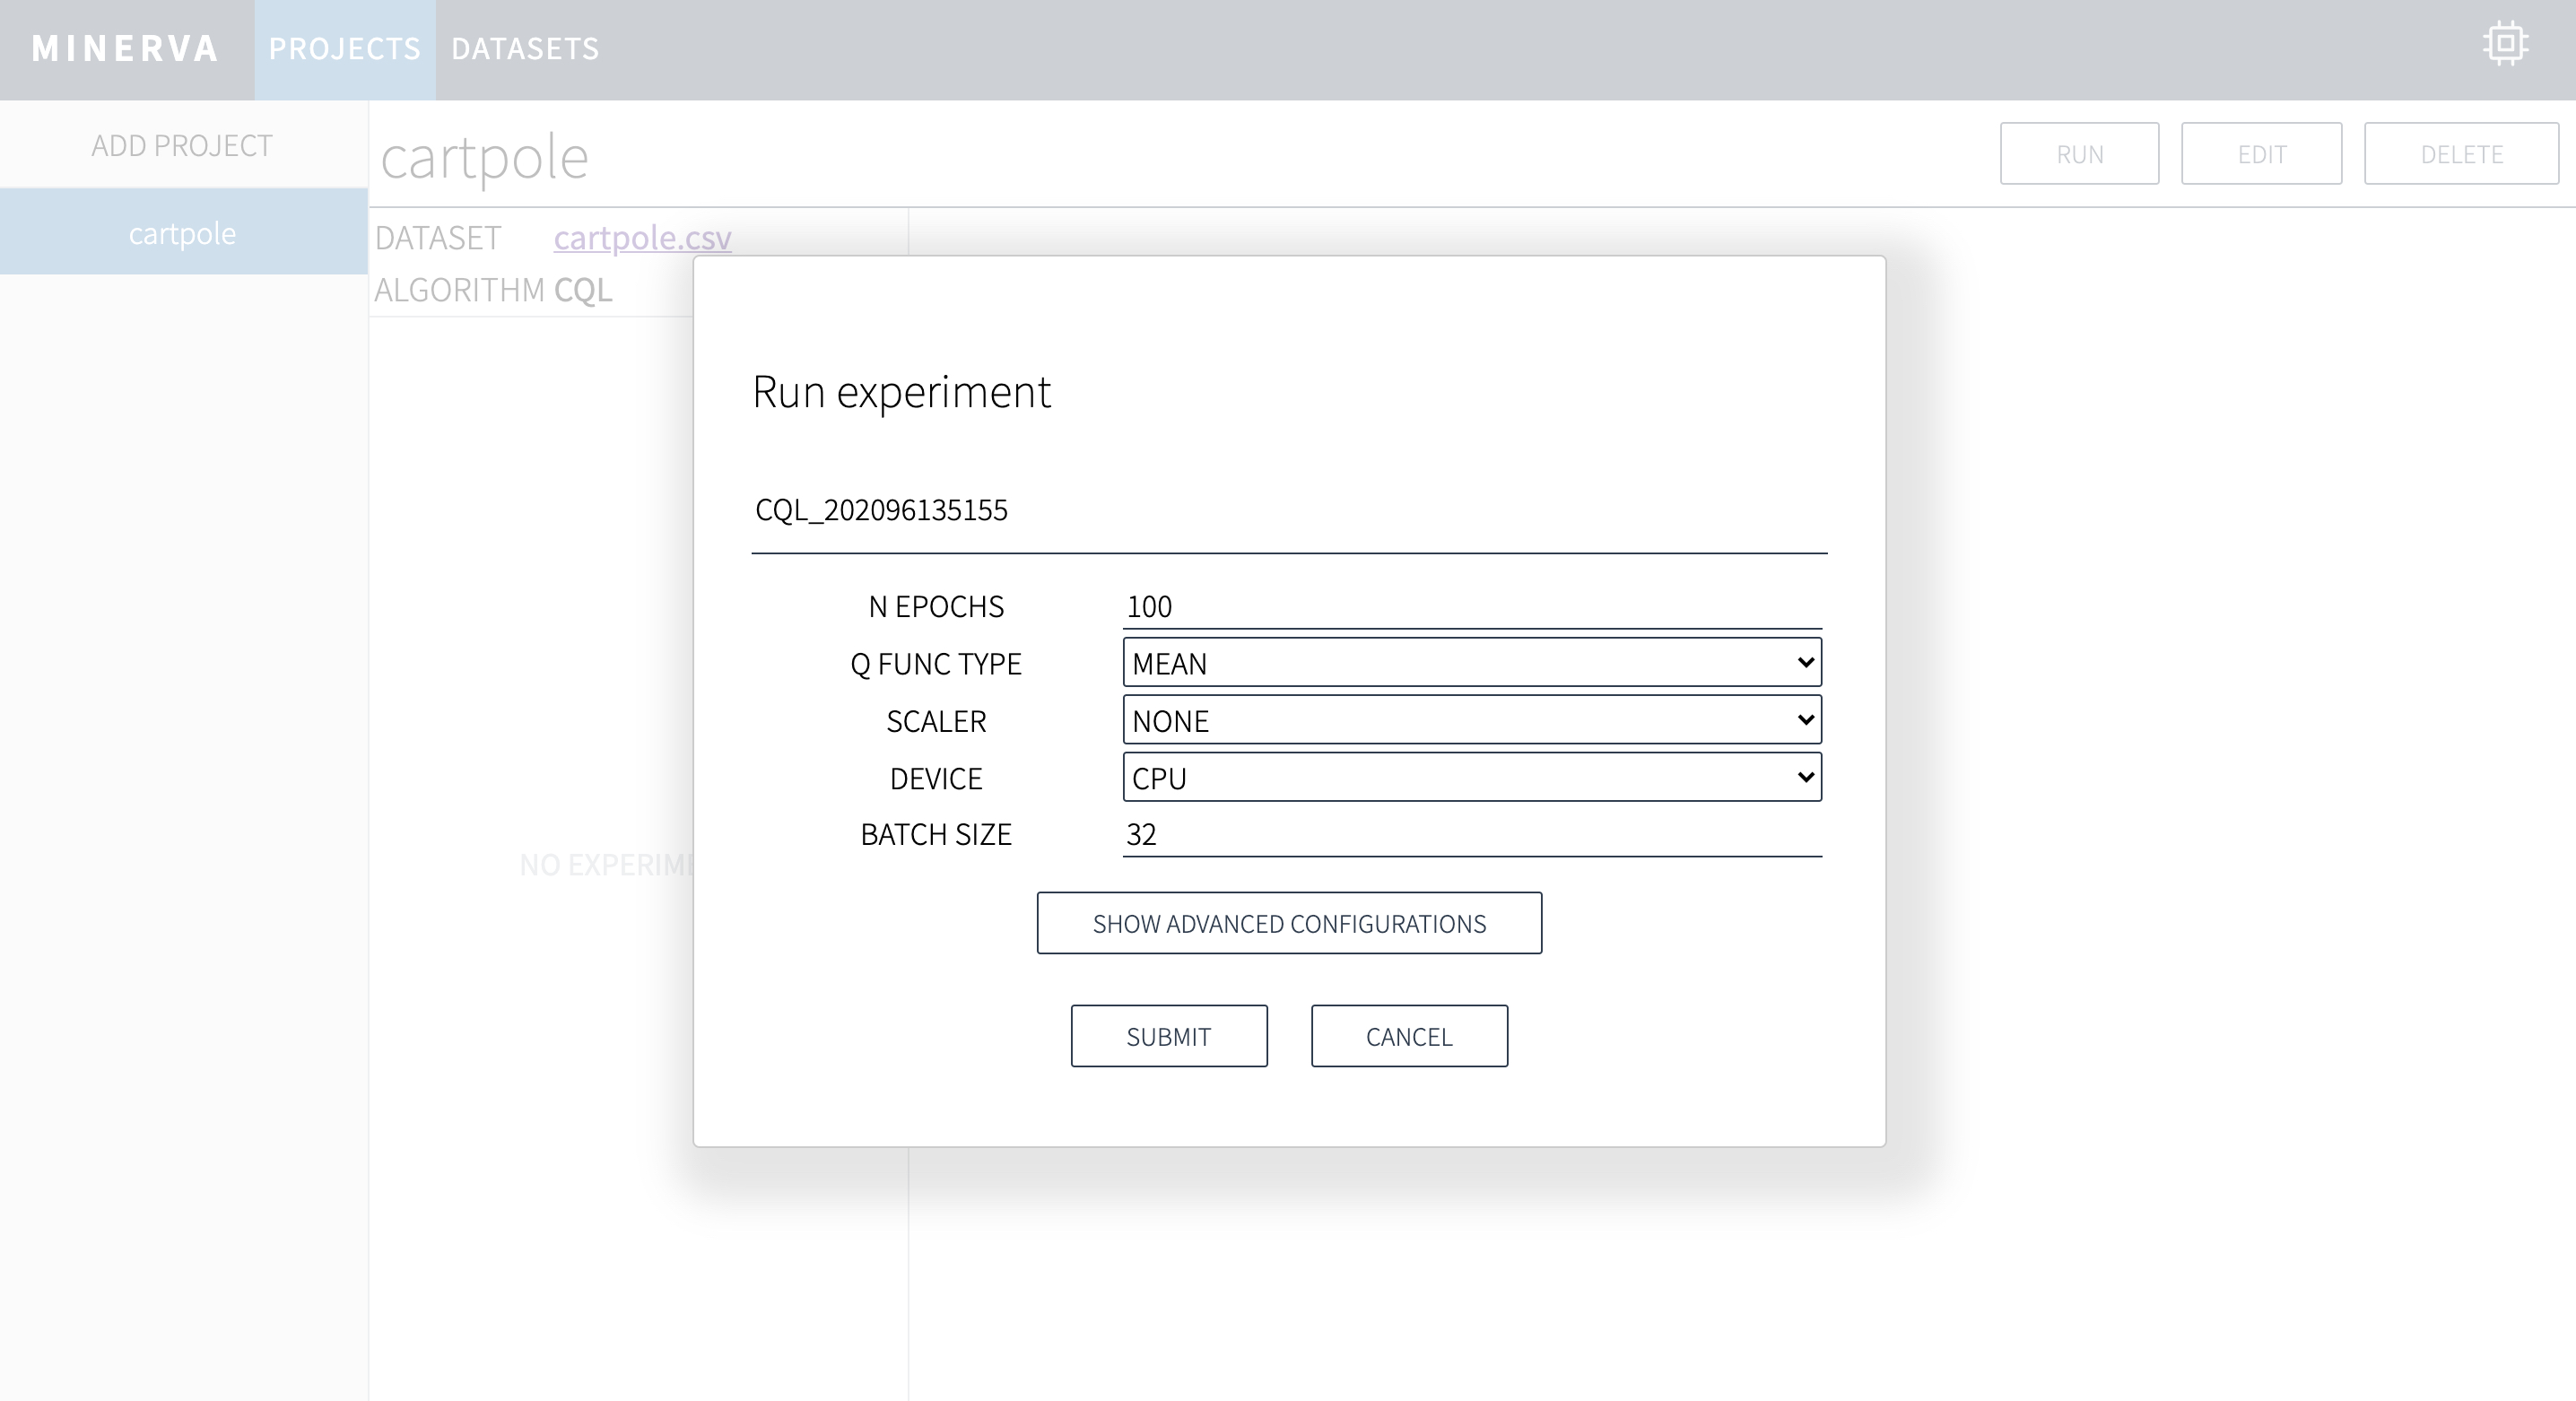
Train with vector observation
- Configure training settings.
- Choose device to use CPU or GPU.
- (optional) Configure advanced settings to click
SHOW ADVANCED CONFIGURATIONS. - Click
SUBMITto start training.
Train with image observation
To train with image observation, you will see different configurations from
vector observation projects.
The most important option is N_FRAMES which controls frame stacking to
handle temporal data without recurrent networks.
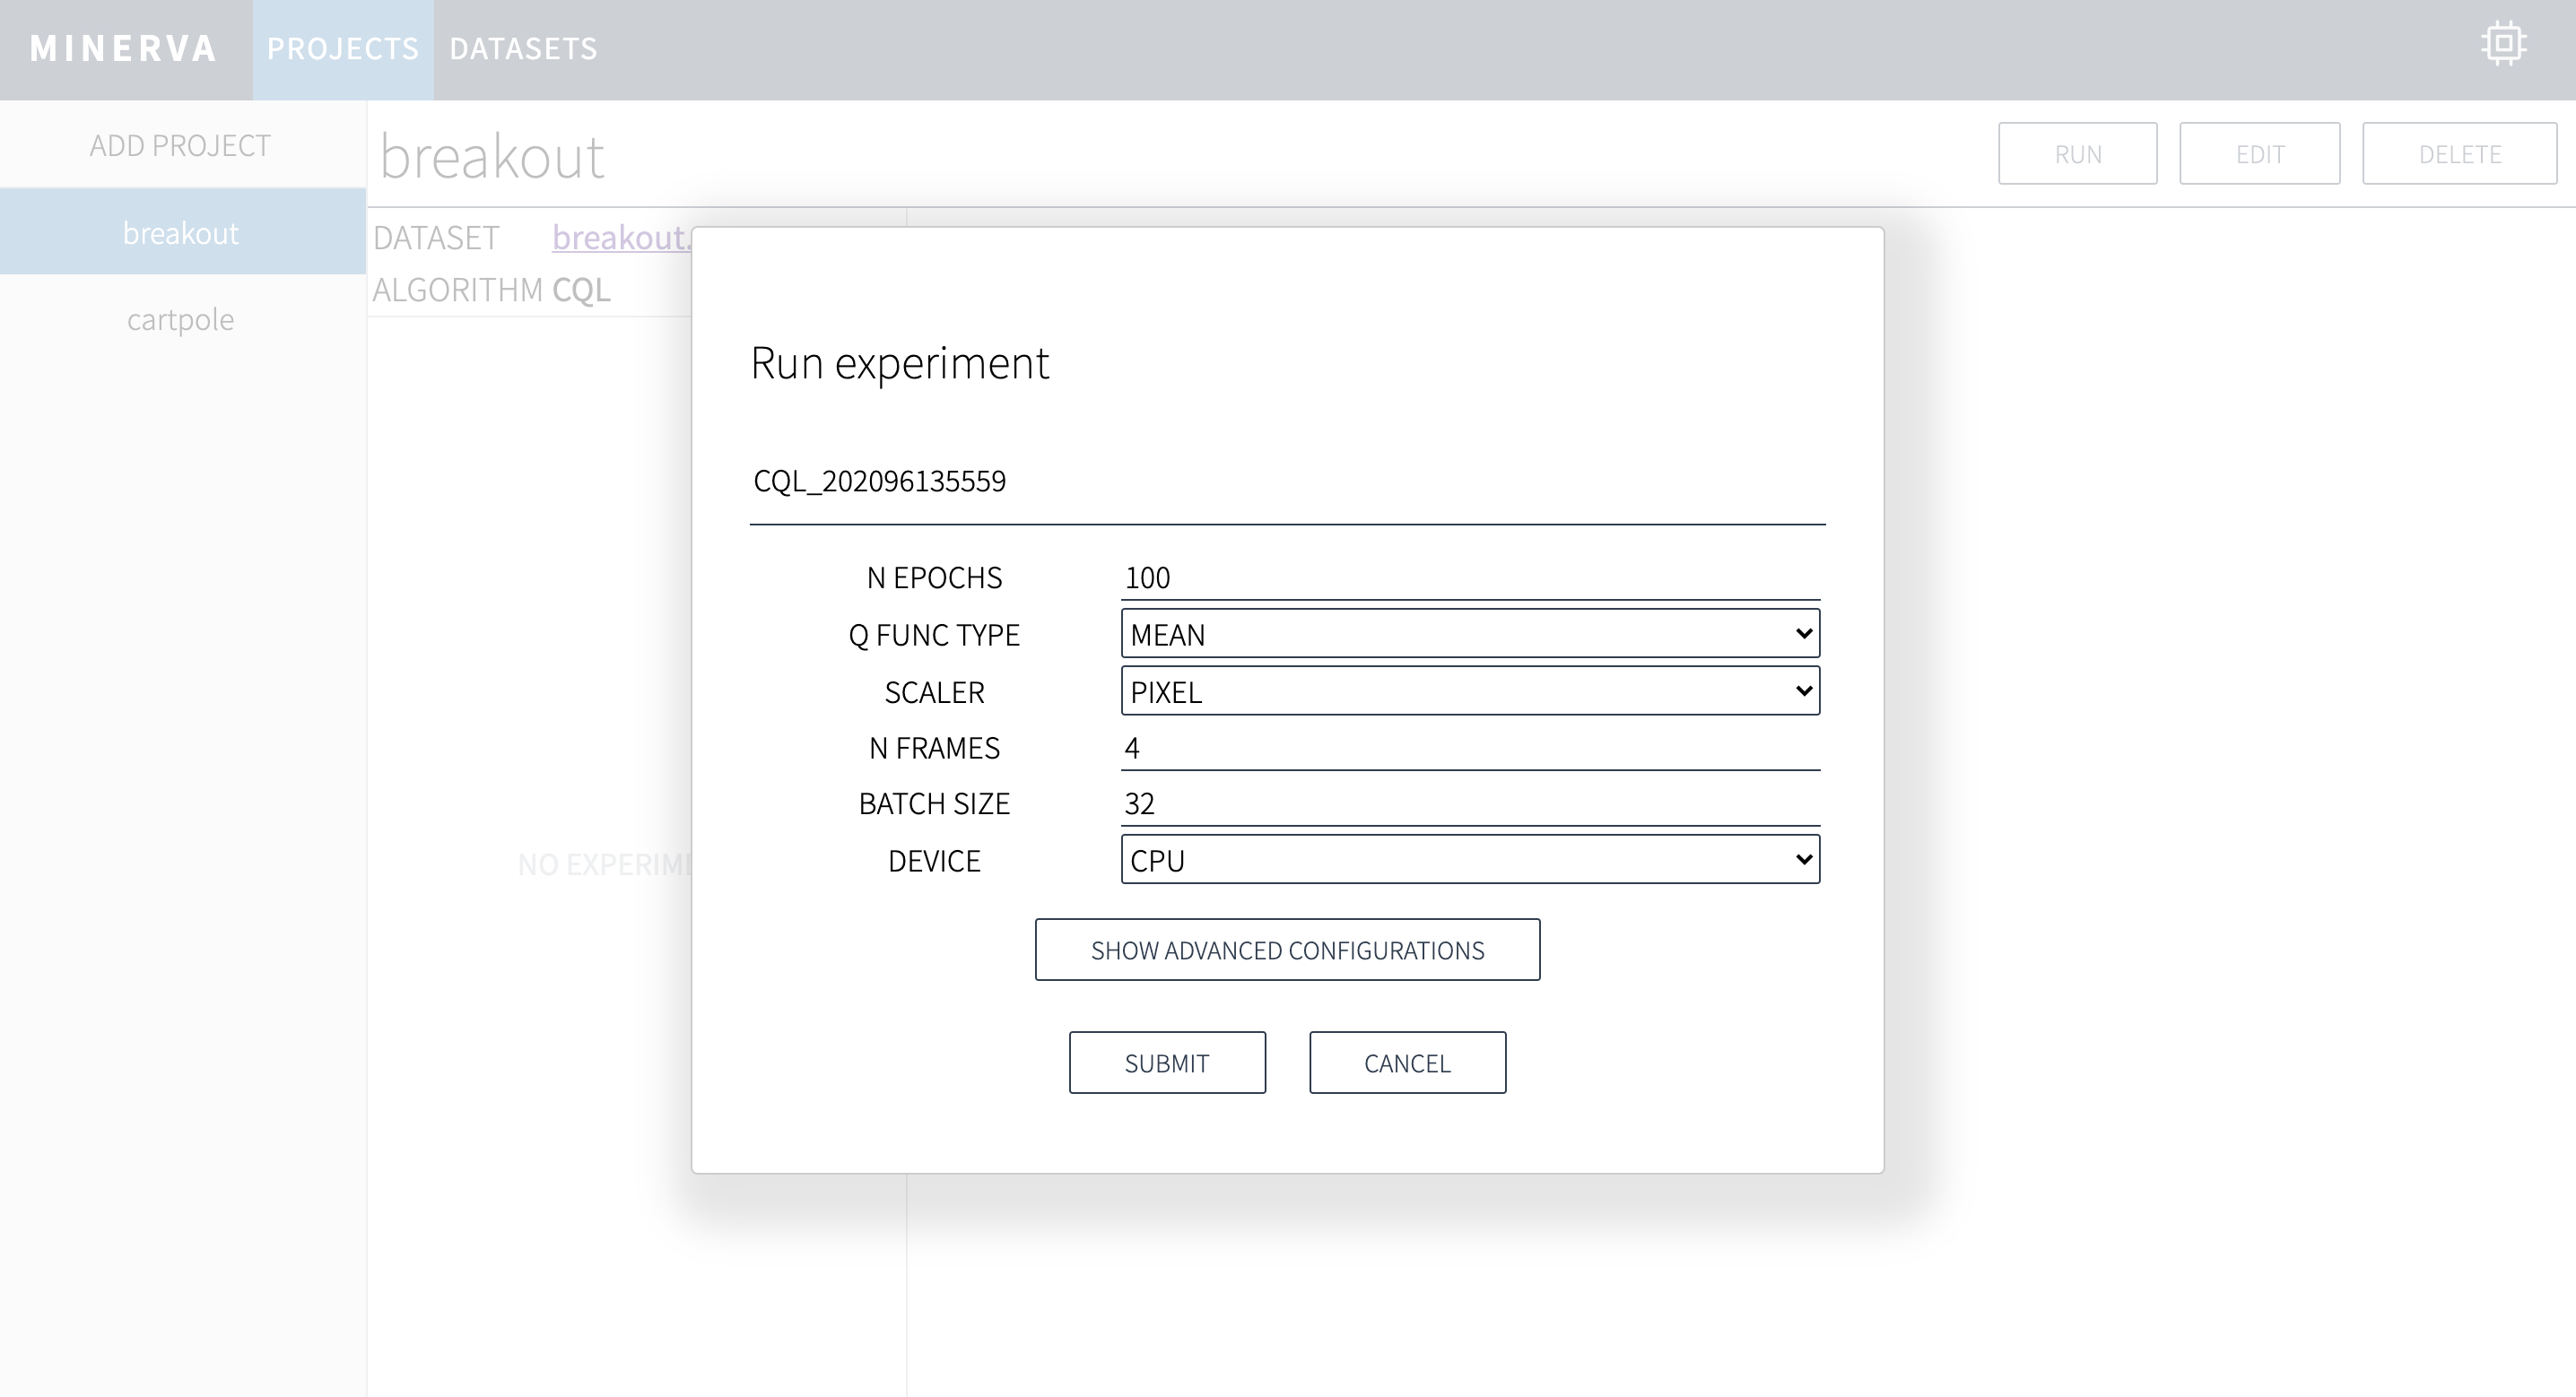
Note
Basically, the SCALER option should be set to PIXEL when training with image observation.
Once starting training, you will see information about your training.
If you need to kill the training process in the middle of training,
click CANCEL button.